Metronet Self-Installation Guide: Easy Fiber Internet Setup at Home
- David Martin
- November 14, 2023
- No Comments
Congratulations on choosing Metronet! To ensure a smooth installation of your new service, we’ve created this easy-to-follow guide. Let’s dive into the self-installation process and get you connected in no time.
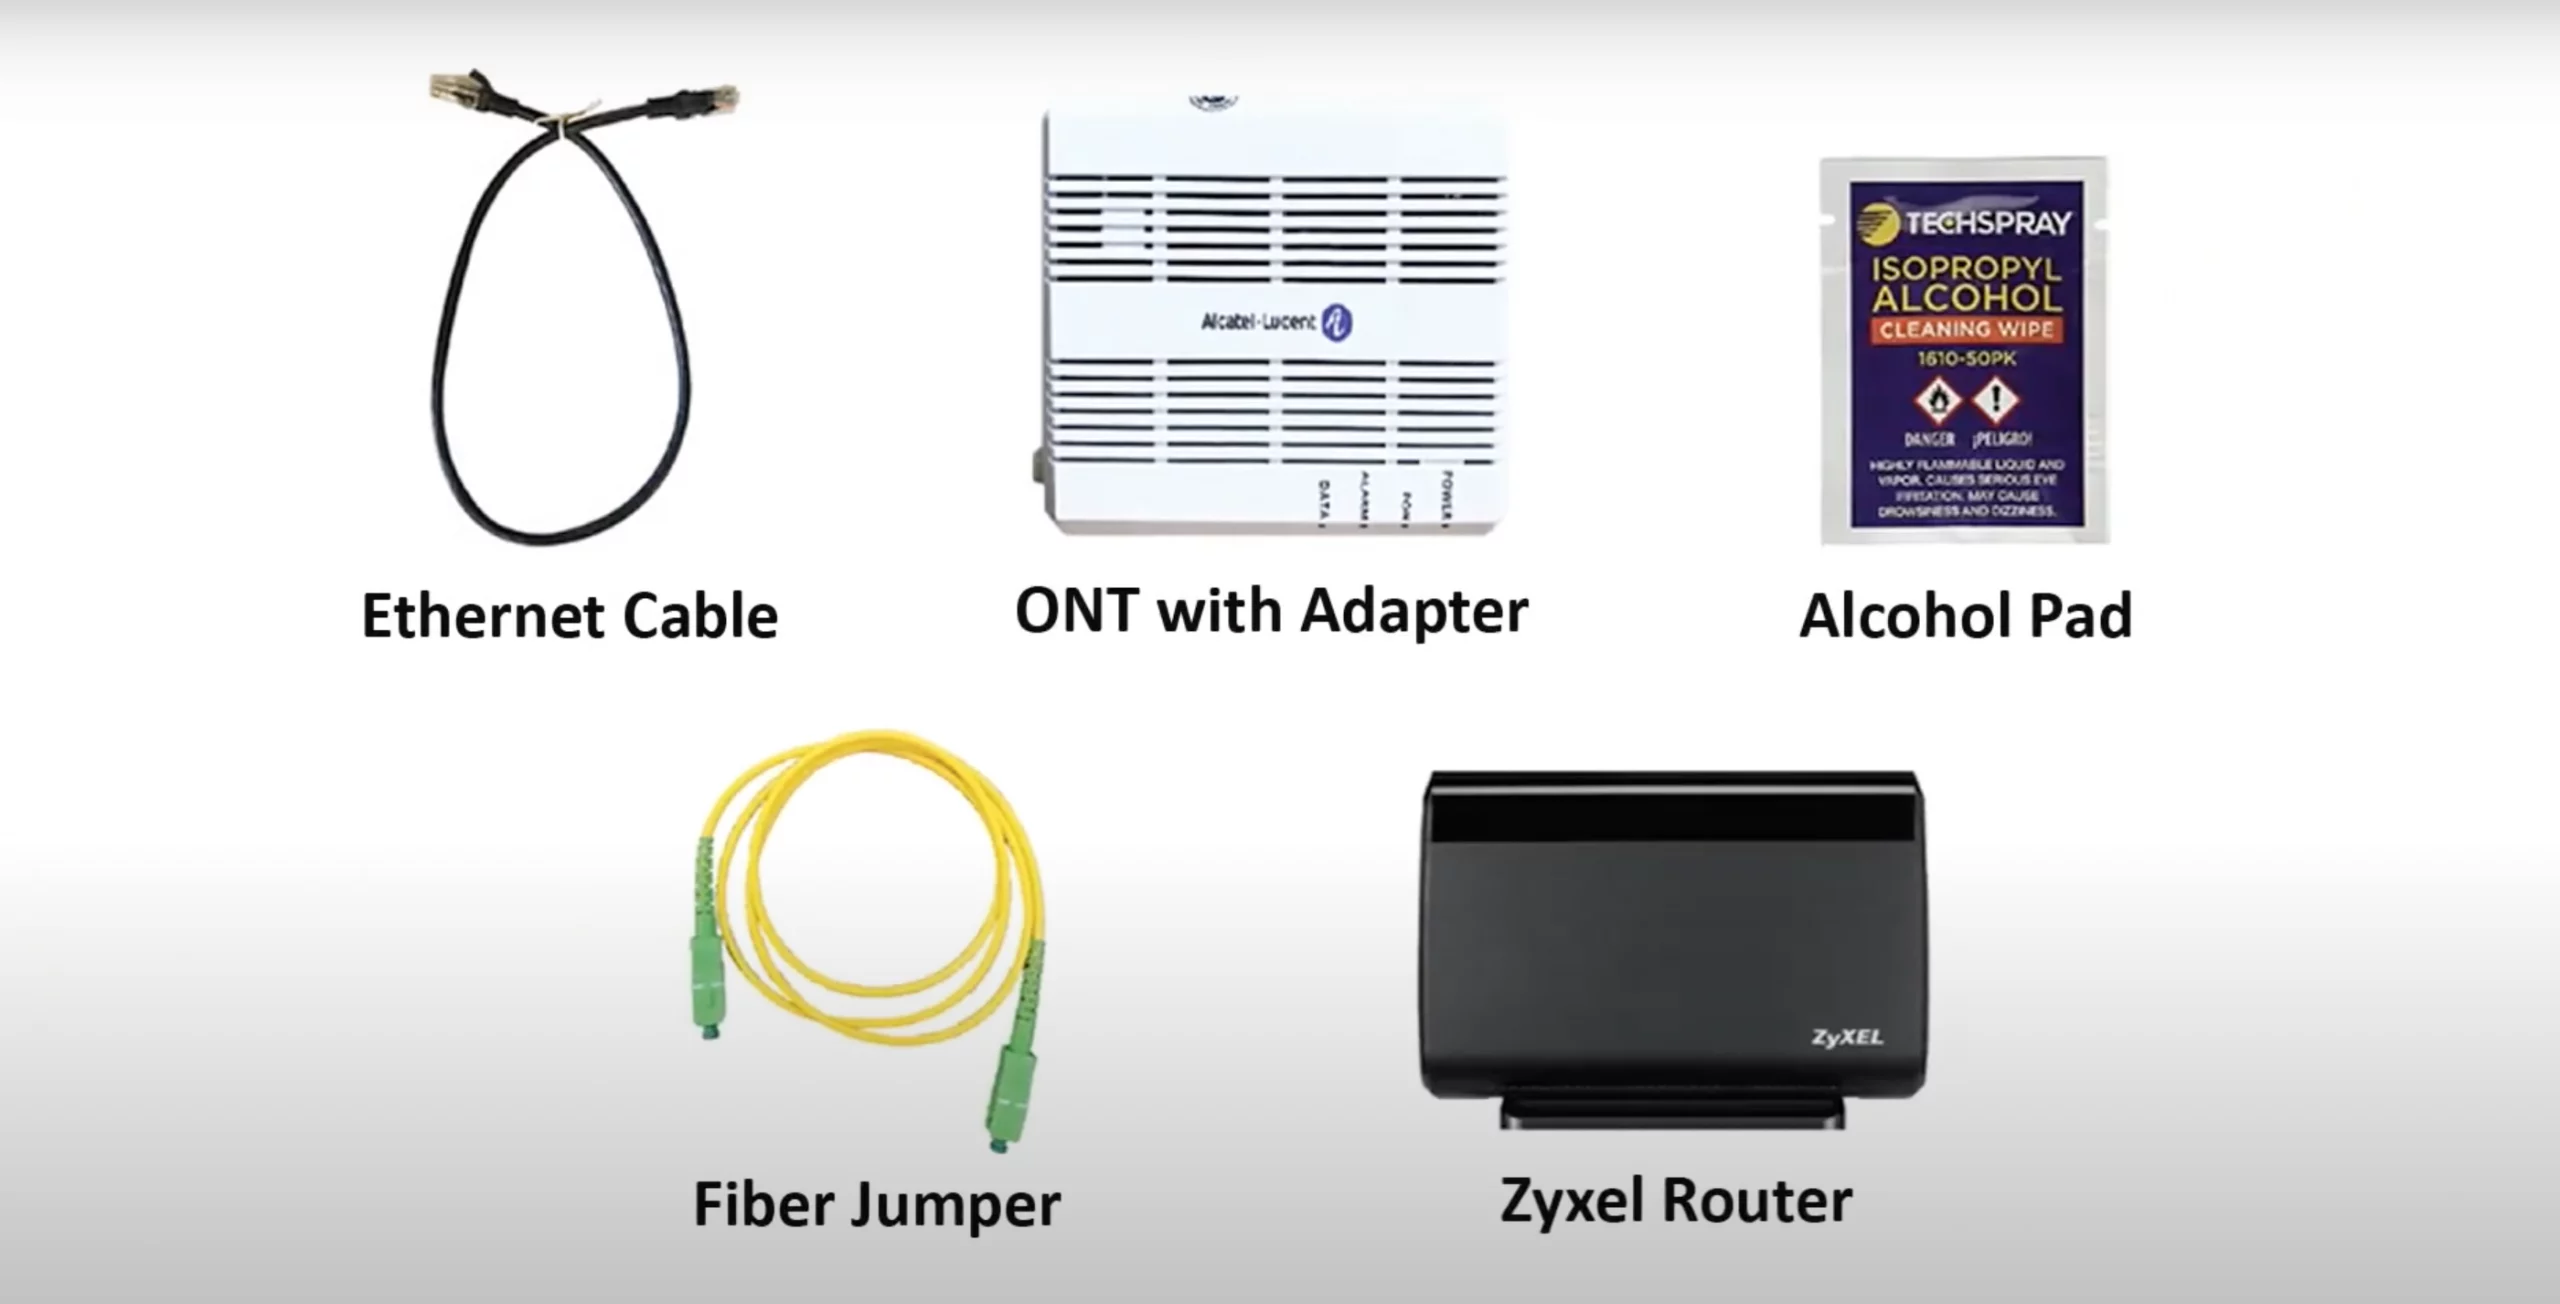
What's in Your Self-Install Kit?
Your kit contains:
- Ethernet Cable
- ONT (Optical Network Terminal) with Adapter
- Alcohol Pad
- Fiber Jumper
- Zeisel Router
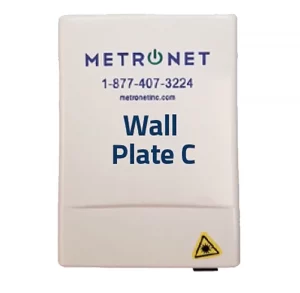
Identifying Your Wall Plate
This guide is tailored for users with a standard wall plate (as shown here). If your wall plate differs, please refer to the written instructions in your kit.
Step-by-Step Installation Instructions
Preparing the Fiber Jumper:
Find the bulkhead connector.
Remove the dust cap from the fiber jumper.
Use the alcohol pad to clean the fiber tip. Wipe once and let it dry for 15 seconds.
Connecting the Fiber Jumper:
Attach one end to the bulkhead connector.
Clean the other end, then connect it to the PON port on the ONT.
Safety Warning: Avoid looking directly into the fiber jumper’s light to prevent eye damage.
Activating the ONT (for Internet-only services):
Plug the ONT into a power outlet.
Press the ‘On/Off’ button and wait up to 10 minutes for the lights to turn green.
Setting Up Your Wireless Router:
Connect the router to a power source and turn it on.
Link the Ethernet cable from the router’s blue WAN port to the ONT’s yellow Ethernet port.
Wait for the router’s power light to become solid.
Connecting to Wi-Fi:
Access the wireless network using the name and password on the router’s back label.
Additional Tips
Hardwiring to a Computer
For a direct connection, use an Ethernet cable from your PC to the router’s ports.
Faster Speeds
Connect to the network ending in ‘_5GHz’ for enhanced speed.
Need More Help?
For assistance with set-top box or DVR setup, refer to your kit’s written instructions. Our 24/7 technical support team is always ready to help with any questions.
In Conclusion
We hope this guide has made your Metronet self-installation experience straightforward and successful. Remember, a correctly set up service leads to a smoother, faster internet experience. For further inquiries or support, don’t hesitate to contact us.